Tips for getting started with the iD editor.
Some general notes about data entry in OpenStreetMap
- We make use of the ID Editor in this Guide (although tagging concepts apply to the JOSM editor, as well). More advanced users may want to migrate to the JOSM editor at some point for improved editing efficiency or specialized needs (https://wiki.openstreetmap.org/wiki/JOSM).
- If you’re familiar with Basic panning and editing functionality is similar to other GIS software.
- It is important to become familiar with the shortcuts associated with some of the more heavily used editing tools to expedite the process.
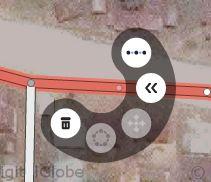
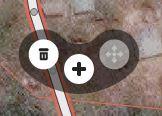
- In ID Editor, shortcuts are accessed by first clicking on the feature (which will be either a line or a point). This brings up several options to edit the feature. Available shortcuts are specified below each editing option on the editing wheel
- Digitize markets as points (nodes) or areas (polygons) and tag with:
- Operating_season – e.g. May - Nov
- Operating_days – e.g. Saturdays and Wednesdays
- Operating_hours – e.g 8am – 12pm
Adjust Imagery Brightness
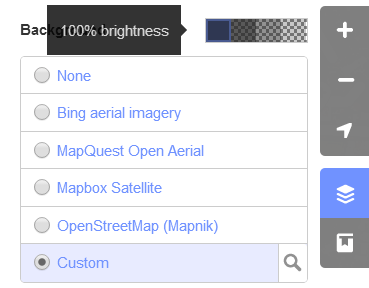
The imagery may appear dim in your browser. You can adjust the brightness by adjusting the background brightness in the Background settings.

Using Shortcuts:
Note: You can access more editing options/shortcuts by holding the shift key and clicking more than one feature. For instance, to merge two lines, hold shift, select the two lines to be merged and then click the + sign.
To pan across ID Editor:
- + (on numpad) – zoom in
- - (on numpad) – zoom out
- ↓, ↑, ←, → (cursor keys) – pan map
To add/edit features:

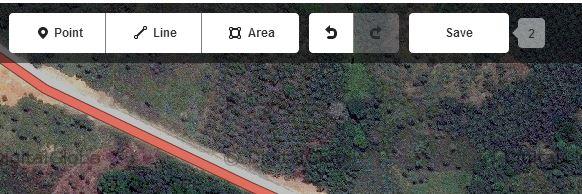
- 1 – switch to “add point” mode
- 2 – switch to “add line” (aka “way”) mode
- 3 – switch to “add area” mode
- A – continue drawing a line at the selected node
- B – display background layer switcher
- C – combine two lines (need to be connected by a shared node and be both selected before)
- D – if shared node of multiple lines is selected: unjoins the associated lines (that duplicate the shared node)
- H – show in-editor help/documentation
Editor Wheel shortcuts (accessing the editor wheel is done by simply clicking on any feature):

- M – move object (if object is selected)
- O – arrange nodes as circle (only closed lines, that is: areas)
- R – rotate object
- S – straighten the selected line, or square the corners of the selected area or closed line
- Ctrl+S – save
Editing multiple features at the same time (ex. Splitting and joining lines):

- ⇧ Shift + mouse click – selection of multiple objects
- V – reverse line direction (if line selected)
- X – split line (if node in line selected)
- Ctrl+Z – undo last action
- Ctrl+⇧ Shift+Z / Ctrl+Y (on Windows) – redo last undid action
- Ctrl+Del / Ctrl+← Backspace – delete currently selected object
- ↵ Enter / Esc – stop drawing of a line or area
- F11 (Linux, Windows) / Ctrl+⌘ Cmd+F (Mac) – set your browser to full screen mode for more space (generic browser shortcut and varies by browser)
Saving Your Work
When you save your work, you’ll be prompted to enter a Commit Message, as shown in Figure 4 . Please enter a brief, but descriptive sentence on what features you entered. And make sure to add the #osmgeoweek hashtag, to show your support for Geography Awareness Week.

Save edits often. Sometimes, when more than one person was editing the same feature, iD Editor will throw an error.


